Warm Chocolate Pudding Cakes with Whipped Cream & Cacao Nibs

Okay, warm chocolate pudding cakes are seriously one of the best things I have ever tasted in my life. For real. If you are a diehard chocolate lover, you really need to make this dessert.

I made these chocolate pudding cakes for the first time during some snow days I had years ago. On snow days, I always love to make new meals or treats. I found this recipe in a cookbook, Scharrfen Berger “The Essence of Chocolate” cookbook. These warm chocolate pudding cakes are rich and chocolatey but not too sweet – and they are the ultimate comfort dessert. I hope you enjoy these amazingly scrumdiddlyumptious warm chocolate pudding cakes.

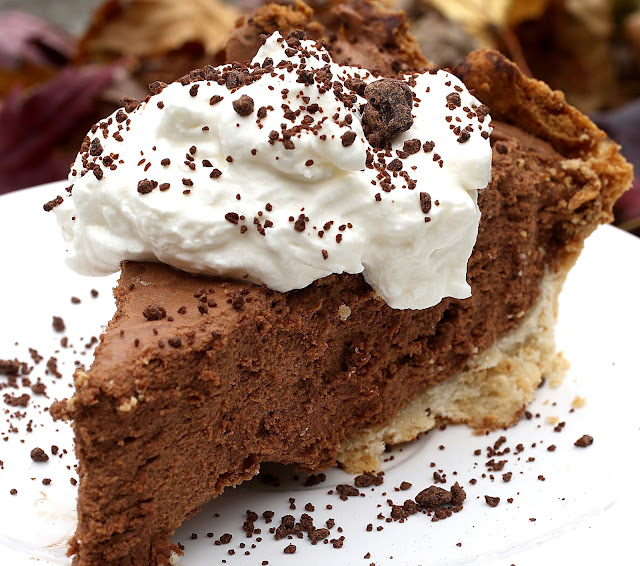
Recipe for Warm Chocolate Pudding Cakes with Whipped Cream & Cacao Nibs

INGREDIENTS

  • For preparing ramekins: Unsalted butter, cocoa powder
  • 3.5 ounces of 99% unsweetened chocolate, finely chopped
  • 1 cup of heavy whipping cream
  • 4 Tbsp. of unsalted butter, cut into 1-inch cubes
  • 2/3 cup granulated sugar
  • 1 Tbsp. cornstarch
  • 1/4 tsp. salt 2 eggs
  • For topping: 1/2 cup heavy whipping cream, cacao nibs

DIRECTIONS

Adjust oven so that a rack is in the middle position and then preheat to 325 degrees.

Butter 4 – 5 ramekins or oven safe bowls that hold at least 6 ounces. Dust the bottoms and sides of each one generously with cocoa powder, making sure to tap out the loose excess powder.

Put the heavy whipping cream and cubed butter into a medium-sized pan. Place over medium heat and bring to a simmer. Once it simmers, immediately add in the finely chopped chocolate. Remove from heat and allow it to sit for one minute. Then whisk the mixture until the chocolate is completely melted and the mixture is nice and smooth.

In a large bowl, sift the sugar, cornstarch, and salt together. Add in the eggs and whisk. While whisking, add in the melted chocolate and mix until well incorporated. Place a fine mesh strainer over top a 4-cup liquid measuring cup. Pour the mixture through the strainer. You will get about 3 cups of batter in the measuring cup. Pour the batter into the prepared ramekins/oven safe bowls. Place them onto a baking sheet and put into the oven. Cook for 30 – 35 minutes, or until the tops are puffed up and slightly cracked. Allow to cool for 10 – 15 minutes.

While the pudding cakes are cooling, make the whipped cream. Place 1/2 cup of heavy whipping cream into a metal bowl and use an electric hand mixer set on high speed to mix until stiff peaks form. Top each pudding cake with a couple tablespoons of whipped cream and some cacao nibs.

*These are best when warm. If you save them, cover tightly with plastic wrap and store in fridge. Place in microwave for about 25 – 30 seconds before eating.

Recipe Source: The Essence of Chocolate, by John Scharrfenberger and Robert Steinberg

Cheese Tortellini Soup with Chickpeas, Sundried Tomato, and Artichoke

Cold weather means that it is time to eat more soup! This cheese tortellini soup is super yummy and flavorful. There are no onions, garlic, or salt in the recipe! The first time that I made it, Greg told me it would be nice if I had prosciutto or some other type of meat to add to it. However, once he had his first bite, he did not miss the meat at all!

Not only does this soup taste incredible, but it is also so simple to make. It requires minimal chopping (just the sun dried tomatoes) and barely any cook time. You can probably make it from start to finish in less than 15 minutes. Enjoy!

Recipe for Cheese Tortellini Soup with Chickpeas, Sundried Tomato, & Artichoke

INGREDIENTS

7 cups of chicken or vegetable broth (use vegetable to make the soup vegetarian)
3/4 cup of thinly sliced sun dried tomatoes in oil, drained of the oil (reserve 2 tsp.)
1 9 – 10 ounce package of refrigerated cheese-filled tortellinis
2 15-ounce cans of chickpeas, drained
1 8.5 ounce can of chopped artichoke hearts in water, drained (do not use marinated artichokes)
3/4 cup of half and half or light cream
3/4 tsp. of crushed red pepper flakes
Several grinds of freshly ground black pepper
Baby spinach leaves (for topping)
Freshly grated Parmesan cheese (for topping)

DIRECTIONS

Put the broth into a dutch oven and set over high heat. Bring the broth to a boil and then add in the sun dried tomatoes and tortellini. Boil for 5 minutes, then lower the heat to medium low. Add in the chickpeas, artichokes, reserved sun dried tomato oil, half and half, crush red pepper flakes, and freshly ground black pepper. Cook for another 5 minutes.

Ladle soup into bowls. Top each with desired amount of baby spinach leaves and stir. Then top with freshly grated Parmesan cheese. Serve with your favorite crusty bread, if desired.

Recipe makes about 8 servings
Recipe Adapted from: Foodie Crush 

Zuppa Toscana

Hearty and savory soup with sausage, kale, and potatoes.

This zuppa toscana soup is AMAZING. I made this soup for the first time almost ten years ago, and I have continued to make it several times since then. When I serve this soup at parties, almost everyone who tries it asks me for the recipe. It is so flavorful – it’s made with kale, potatoes, and sausage.  The flavor is so perfect and all I can say is that it is just so delicious. There are barely any meals that my husband truly raves about, but he always is impressed by this zuppa toscana. I hope you will enjoy the soup as much as we do.

Recipe for Zuppa Toscana

INGREDIENTS

1 pound of mild ground Italian sausage
1 large yellow onion, chopped
3 cloves of garlic, minced
1/2 cup of dry white wine or white cooking wine (to deglaze the pan)
1/2 – 1 tsp. of red pepper flakes
2 large or 4 small russet potatoes, peeled and cut into 1/2-inch chunks
2 cups of kale, chopped to your desired size
4 cups of chicken broth
2 cups of water
3/4 cup of heavy cream
Salt and pepper

DIRECTIONS

Place a large stockpot on the stovetop over medium heat. Put the sausage in the pan and cook until it is browned and fully cooked through. Remove the sausage from the pan using a slotted spoon and transfer it to a bowl. Add the chopped onions to the pan and saute for about 5 minutes. Add in the minced garlic and red pepper flakes to the pan and cook for one minutes. Pour the wine into the pot and stir, scraping the bottom of the pan to loosen any browned bits (when you pour the wine in, a lot of steam might come up). Add in the chicken broth, water, potatoes, and kale to the pot. Put the sausage back into the pot. Increase the heat to medium-high and bring to a boil. Once it begins to boil, reduce the heat to medium-low and cover the pot. Let the soup simmer for about 20 minutes, or until the potatoes are cooked through. Stir in the heavy cream and season with salt and pepper. Serve immediately.

Recipe Adapted from: Annie’s Eats

Salted Caramel Brownies

Before the craziness of mother and work demands and of course the pandemic, I used to do baking days with friends of mine. I used to go online and look for fun recipes, and then send them to friends to choose what recipe we wanted to make together. These salted caramel brownies were one of the things that I had considered for one of those baking days, but it did not win first place. . However, I kept thinking about them and made a decision that I had to make them! I shared with friends and family, and I was told they were the best brownies ever by several people. The salted caramel brownies are sweet, fudgy, gooey, and delicious!

*Because these brownies are so fudgy, you can actually cut them into mini bites and they can be served as candies or fudge. But I won’t judge you if you eat a big brownie or two or three large brownies either.

Recipe for Salted Caramel Brownies

INGREDIENTS

For the salted caramel sauce
1/4 cup water
1 cup of granulated sugar
2 Tbsp. of light corn syrup
1/2 cup of heavy whipping cream
1 tsp. of sea salt
1/4 cup of sour cream
For the brownies
1 1/4 cups of all-purpose flour
1 tsp. of coarse sea salt
2 Tbsp. of Dutch processed cocoa powder
A couple pinches of instant coffee powder
11 ounces of bittersweet baking chocolate (I used Ghiradelli), coarsely chopped
16 Tbsp. of unsalted butter, cut into 2-inch pieces
1 1/2 cups of granulated sugar
1/2 cup of light brown sugar, packed firmly
5 eggs, at room temperature
2 tsp. of pure vanilla extract
For topping
Sea salt and coarse sugar

DIRECTIONS

For the caramel sauce
Put the water, sugar, and corn syrup into a saucepan and set it over medium high heat. Stir almost constantly and cook until it becomes a deep amber color or reaches 330 degrees on a candy thermometer. This will take about 15 – 20 minutes. Be careful not to let the mixture burn!

Then remove the saucepan from the heat. Put the cream in a microwave safe liquid measuring cup and heat for 45 seconds. Then slowly pour some cream down the side of the saucepan and whisk constantly, then continue to add more until all of the cream is incorporated (the mixture will steam and bubble up during this process). Then add in the sea salt and sour cream and mix well. Set the caramel sauce aside to cool.

For the brownies
Preheat the oven to 350 degrees and line a 9 x 13 baking pan with parchment paper. Put the flour, sea salt, cocoa powder, and coffee powder into a smallish bowl and sift together. Put the chopped chocolate and cut butter into a large saucepan and set over low heat. Gently stir until the butter and chocolate are melted and smooth. Remove from heat. Add in the granulated sugar and light brown sugar to the chocolate mixture and use an electric hand mixer set on medium speed to fully incorporate. Then add in the eggs and mix well. Stir in the vanilla extract. Then pour in the flour mixture and stir until just combined.

Carefully spread half of the brownie batter into the prepared pan. Smooth down with a spatula. Then pour the caramel sauce over the top of the batter into an even layer. Top the caramel sauce off with the rest of the brownie batter, making sure to carefully smooth over the caramel and fully covering it. Put into the oven and bake for 30 – 35 minutes, making sure to rotate the pan halfway through the baking process. Remove brownies from oven and transfer to a wire rack to cool completely. Once cooled, sprinkle the sea salt and coarse sugar over the brownies (about 1/2 – 1 tsp.). Cover the brownies and put them into the fridge before cutting. This helps to make them extra fudgy!

Recipe makes about 2 dozen regular-sized brownies and makes about 60 small bites.

Recipe Source: Pink Parsley, originally from Baked Explorations

Cauliflower Burgers

Yeah, yeah, so I know what you are probably thinking. Cauliflower…in a burger? Yes, it’s a thing, and it’s a totally awesome thing. I came across the recipe for cauliflower fritters on the vegetarian food blog Oh My Veggies. This recipe is an adaptation of those fritters. I was a little skeptical of it but I thought it was worth a shot after reading all of the glowing comments from readers who had already tried the recipe. I am so happy I tried them!  Greg was definitely skeptical the first time I made these and I told him that I was making burgers out of cauliflower. He had never liked cauliflower before, and after eating a couple of the burgers, he said that he never knew that cauliflower could taste so good! I agree. I have never been a huge fan of cauliflower either, and now I am always excited about recipes that involve cauliflower. These burgers are easy to make and take about 1 hour or less from start to finish. They are a great vegetarian meal where nobody will miss the meat. Don’t forget to add the spicy mayo! Enjoy.

Recipe for Cauliflower Burgers

INGREDIENTS

1 cup of baby carrots, chopped into matchstick sized pieces
2 cups of cauliflower florets
1/2 cup of all-purpose flour
1/2 tsp. of garlic powder
1/4 tsp. of cayenne pepper
1/4 tsp. of kosher salt
freshly ground black pepper
2 Tbsp. of Panko breadcrumbs
1/3 cup plus 2 Tbsp. of finely grated Asiago, Parmesan, or Romano cheese
1 egg, lightly beaten
1/4 cup of Italian parsley leaves, stems removed and torn
Olive oil or olive- canola oil blend, for frying

Fixings: 
Spicy Mayo: In a small bowl, mix together 4 Tbsp. of mayonnaise, freshly ground black pepper, 1/8 tsp. of garlic powder, and a couple pinches of cayenne pepper. Taste and adjust seasonings to your liking.
6 Lightly Toasted Buns
Baby Spinach Leaves

DIRECTIONS

Bring a pot with 4 cups of water to a boil and add in the chopped carrots and cauliflower. Cook for 4 minutes. Drain well. Transfer vegetables to a cutting board and chop more finely (it doesn’t have to be perfect, you can have some bigger pieces and some smaller pieces)! Gather vegetables in paper towel and press down try to get out as much excess water as possible. Transfer to a large bowl. Add in the flour and stir well to coat. Add in the garlic powder, cayenne pepper, salt, pepper, Panko bread crumbs, grated cheese, egg, and parsley leaves and gently mix until ingredients are well incorporated.

Heat 1 – 2 Tbsp. of oil in a saute pan over medium high heat. Use a 1/3 cup measuring cup to scoop up mixture and then tap it onto the saute pan. Press down with a spatula to shape into a patty. Cook for about 3 – 4 minutes, or until golden brown on one side. Carefully flip and cook the other side until it is browned. Transfer to a plate. Continue this process until there is no more batter left. Then sprinkle each one with salt and pepper. If desired, place patties on a baking pan and heat in the oven at 225 degrees for a couple minutes while the buns are toasting, just to warm them back up a little.

Toast the buns lightly in a toaster oven. Put mayo on each side of the bun, add on the patty and a few spinach leaves. Serve with your favorite sides. We served them with baked beans and potato chips!

Recipe Adapted from: Oh My Veggies

Recipe makes 6 burgers (unless you nibble a bunch on the burgers while making them…)

Italian Wedding Soup with Homemade Meatballs

Are you planning to make a special Valentine’s dinner, but you aren’t sure what you want to make? Consider making a pot of Italian Wedding Soup! I was introduced to Italian Wedding Soup years ago when I worked at  a Teacher Resource Center in Howard County. For lunch, I would walk across the street to Produce Galore (which has since gone out of business – so sad), and I would choose from their amazing soup selections. Every once in awhile they would have the Italian Wedding – and I made sure to get bowls (with extra meatballs) for myself, my boss, and coworker. We LOVED Italian Wedding Soup day! It had been quite a long time since I had the soup until I stumbled across a recipe on a food blog I followed. I made it for the first time when I hosted a party, and it was a huge hit.

Italian Wedding Soup would be perfect for Valentine’s Day. I read about the origins of the soup to learn more. You are right, the soup comes from Italy, and in Italy it is called “Ministra Maritata.” The word maritata translates to “marry” or “wed” in Italian. Apparently many food historians (food historian – I didn’t know there was such a thing) say that maritata relates to the ingredients that are mixed together in the soup, rather than it referring to the soup being served at weddings. I think the ingredients make the recipe a winner. They all come together to create flavors that comfort you and make you feel good. Just like in a marriage, many things have to come together for it to be good. I hope you will find this recipe as delicious and comforting as we do in my home. Enjoy!

Recipe for Italian Wedding Soup with Homemade Meatballs

INGREDIENTS

  • For the meatballs
  • 3/4 lb of ground chicken (I had the meat counter grind up chicken breasts)
  • 2/3 lb of sweet italian sausage, casings removed
  • 2/3 cup of fresh bread crumbs (Italian bread works well)
  • 2 cloves of garlic, minced
  • 3 Tbsp. of chopped fresh parsley
  • 1/2 cup of grated Parmesan cheese
  • 3 Tbsp. of 1% or 2% milk
  • 1 large egg, beaten
  • 1/2 tsp. of salt
  • 1/4 tsp. of freshly ground black pepper
  • For the soup
  • 2 Tbsp. of extra-virgin olive oil
  • 3/4 cup of onion, chopped small
  • 1 1/2 cups of thinly sliced carrots (about 1/4-inch or so)
  • 1 clove of garlic, minced
  • 8 cups of chicken broth
  • 1/2 cup of dry white wine or white cooking wine
  • 1 1/4 cups of Ditalini pasta
  • 1/4 – 1/3 cup of minced fresh dill
  • 4 – 6 ounces of baby spinach leaves
  • Grated parmesan cheese, for topping

DIRECTIONS

For the meatballs (meatballs can be made the day before)
Preheat the oven to 350 degrees. Line 2 baking sheets with parchment paper or a silicone baking mat.
Place the ground chicken, sausage, bread crumbs, garlic, parsley, cheese, milk, egg, salt, and pepper in a large bowl. Use a fork to gently mix together until fully combined. Use your hands or a cookie dough scoop (that is what I did) to form into meatballs that are about 1 1/4-inches. Place the meatballs onto the baking sheets. Bake for 35 – 40 minutes, or until fully cooked and lightly browned. Set aside. *If made the day before, allow them to cool and then transfer to an airtight container and put in fridge. Before adding them to the soup, zap them in the microwave for about 45 seconds.

For the soup
Put the olive oil in a large pot and set over medium heat. Once heated, add the onions and carrots. Saute until the vegetables are softened, about 4 – 5 minutes. Add in the garlic and cook for 30 seconds. Stir in the chicken broth and the white wine. Bring the soup to a boil. Once boiling, add in the pasta and cook until al dente (about 7 – 10 minutes, but total time depends on the pasta – check package directions to determine how long to cook). Add in the dill. Add the meatballs to the soup and cook for 1 – 2 minutes. If desired, sprinkle in a little bit of salt and pepper. Stir in the baby spinach leaves and cook for 1 minute. Garnish each bowl of soup with Parmesan cheese and serve soup with crusty bread, if desired.

The soup tastes good leftover, but the spinach can get a little soggy. I sometimes add fresh spinach leaves when I reheat leftover soup.

Recipe Adapted from Annie’s Eats, originally from Barefoot Contessa: Back to Basics

Not So Sloppy Turkey Sloppy Joes

Sloppy Joe, Slop, Sloppy Joe

There were only a few meals that I did not like to eat when I was a kid. I was never fond of meatloaf or Sloppy Joes. Luckily, both these meals weren’t something that were served frequently in my parent’s home. I didn’t mind singing about Sloppy Joes after Adam Sandler sang his Lunch Lady song on Saturday Night Live, but I still wasn’t interested in eating them. It had been at least 25 years since I thought about eating a Sloppy Joe sandwich until I saw this Sloppy Joe recipe on a blog that I like. I read the author’s writeup and apparently she wasn’t crazy about the idea of  Sloppy Joes EITHER until trying them again with this recipe. So I thought I’d give it a try and  I’m glad I did.

Greg is also not a Sloppy Joe person and he was really happy with these not so sloppy Sloppy Joes! I have made them quite a few times since I first tried them out. Even my daughter. who changes her mind from day to day on what she likes, always enjoys these sloppy joes!
I call them “not so sloppy” because they aren’t too saucy and the sandwich pretty much stays in tact. I omitted the tomato sauce from the recipe and used ketchup instead. This recipe uses ground turkey and the sauce combines things like root beer and apple cider vinegar. Try them out! Enjoy.

Recipe for Not So Sloppy Turkey Sloppy Joes

INGREDIENTS

1 Tbsp. of olive oil
2 Tbsp. of dried onion flakes
1 pound of ground turkey meat
2 cloves garlic, pressed
1 tsp. dried mustard powder
1/4 tsp. cumin powder
2 Tbsp. of ketchup
1 Tbsp. of apple cider vinegar
2 tsp. of Tabasco sauce
3 ounces of root beer
3/4 Tbsp. of Worcestershire sauce
1/2 tsp. salt
freshly ground black pepper
4 hamburger buns, lightly toasted
Ketchup or other sauce, for serving

DIRECTIONS

Put the olive oil in a large (nonstick) skillet over medium heat. Add in the dried onion flakes, stir, and cook for about 45 seconds. Add in the ground turkey and break the meat up as it cooks. Cook for about 4 – 5 minutes, or until it starts to brown. Stir in the pressed garlic, mustard powder, cumin, ketchup, and salt. Cook and stir until the mixture is fragrant, about 1 minute. Then stir in the apple cider vinegar, Tabasco sauce, root beer, and Worcestershire sauce. Bring the mixture to a simmer and cook for about 7 minutes, or until most of the liquid has evaporated. Season with some ground pepper.

Divide the meat amongst the 4 buns and serve. Serve with extra ketchup or other sauce (I used extra Tabasco on mine), if desired. Serve with your favorite sides. We had some tasty barbecue potato chips and a spinach salad!

Recipe Adapted from: Pink Parsley, originally from Cooking Light, September 2014

Chocolate Silk Pie

The first year I hosted Thanksgiving at our house (2016) Greg and I decided to do salmon as the main course instead of the turkey. We thought about how nobody really talks too much about the turkey, but everyone always raves about the sides. We ended up doing pan seared chicken, salmon, candied sweet potatoes, spinach salad, and brussel sprouts. My mother brought green beans, stuffing, rolls, and cranberry sauce. I felt like our meal did not weigh us down or make us tired, so we were able to go heavy on the dessert. Instead of making an apple pie or pumpkin pie, I went with this decadent chocolate silk pie. It was declared by my mother as the best pie she has ever had (in her 70 years of life), and my in-laws absolutely loved it. Wendy was in heaven when she got her small slice of pie. After each bite, she said, “It’s really good, mommy!” It is that good. If you want a true chocolate treat, try this pie. This may not happen to everyone, but I seriously can feel the endorphins being released from my brain with every bite that I take of this pie. This chocolate silk pie tastes really good, and it might even make you feel really good, too! Enjoy.

Recipe for Chocolate Silk Pie

INGREDIENTS

Pie crust1 1/4 cups of all-purpose flour
1 Tbsp. of granulated sugar
1/4 tsp. of kosher salt
1 stick of very cold butter, chopped into small chunks
3 – 4 Tbsp. of ice-cold waterFor the chocolate filling 
1 cup of heavy whipping cream, chilled 9 ounces of bittersweet chocolate (I used Ghirardelli 60% semisweet chocolate chips)
3 eggs, at room temperature3/4 cup sugar2 Tbsp. of water1 stick (8 Tbsp.) unsalted butter, softened at room temperature1 Tbsp. of pure vanilla extract
Fresh whipped cream, for topping Chocolate shavings or ground chocolate, for topping (optional)

DIRECTIONS

For the pie crustPlace the flour, salt, and sugar into the bowl of a food processor fitted with a metal blade. Pulse briefly to just combine. Add in the very cold pieces of butter. Pulse several times until the mixture resembles coarse crumbs (about the size of peas). With the food processor running, slowly pour a tablespoon of the water through the feed tube. Continue to pour in more water, a tablespoon at a time. After you have poured in 3 tablespoons of water, add in the fourth tablespoon if the dough has not yet left the sides of the bowl. Allow the food processor to keep running until the dough completely leaves the sides of the bowl and forms into a ball. Carefully remove the dough from the food processor and wrap in saran wrap or seal in a plastic bag. Put into the refrigerator for 45 minutes. Roll cooled dough out into a 12 inch circle and put into a 9 inch pie pan. Trim and fold edges, then cover with plastic wrap and place in freezer for 30 minutes.
Adjust an oven rack to the lower middle position. Preheat the oven to 375 degrees. Cut a piece of parchment paper to place over the pie plate so it covers the plates edges. Fill with pie weights. Place in over and cook for 20 minutes. Remove from oven, carefully remove the weights and parchment paper, and lower oven temperature to 350 degrees. Place the pie crust back into the oven and cook for another 8 – 10 minutes, watching carefully until crust is golden but don’t let it burn. Allow to cool completely.

For the pie filling
Whip the cream until stiff peaks form. Place into an airtight container and refrigerate until ready to use. Melt the chocolate in a small saucepan over medium low heat. Remove from heat and set aside to cool to room temperature. Put the eggs, water, and sugar into a saucepan and gently stir together. Set over a pan of simmering water and use an electric hand mixer and mix on medium speed until the mixture is thickened and 160 degrees Fahrenheit on an instant-read thermometer (about 8- 10 minutes). Remove from heat and continue to mix on medium speed for about 8 more minutes (or until the mixture is cooled to room temperature and fluffy). Add the cooled chocolate into the egg mixture and mix on medium low speed until incorporated. Stir in the pure vanilla extract. Then add in the butter, one tablespoon at a time, blending well after each addition. Add in the whipped cream and use a spatula to gently fold in until there are no streaks. Spread the chocolate filling evenly into the prepared pie shell. Cover and place in the fridge to firm up before serving (at least 3 hours). Top with freshly whipped cream and chocolate. 
Recipe Source:Annie’s Eatswhich was slightly adapted from Cook’s Illustrated Entertaining Spring 2011

Mmm, pie.

Pretzel Rolo Turtles

These little treats are super good! I have not actually had these in years though, because my daughter is very allergic to pecans (and every other nut pretty much). That advice they tell you about eating nuts during your pregnancy so that your child is not allergic to nuts — it didn’t work for me. I ate so many nuts during my pregnancy that I could have been vegan, but now we do not even have any nuts in the house (other than us)! I am still posting this recipe to the blog because I am sure that many other people will enjoy this fun treat. They are great to give out at the holidays or to serve to snack on at parties. They are easy to make, totally tasty, and a bit addictive. Enjoy!

Recipe for Pretzel Rolo Turtles

INGREDIENTS

  • One bag of Rolo’s candies (about 52 per bag)
  • 52 pretzels (mini regular, circle, or waffle)
  • 52 toasted pecan halves

DIRECTIONS

First toast the pecans. Preheat the oven to 310 degrees. Spread pecans out on a baking sheet in a single layer. Place in the oven and cook for about 10 – 15 minutes (if you like lightly toasted, do 10 minutes – if you like more toasty – do 15 minutes or more). Remove pecans from oven and allow to cool slightly. Turn off oven.

Unwrap the Rolo’s and place into a bowl. Once pecans are cooled, transfer them to a plate or bowl. Arrange the pretzels in a single layer on the baking sheet you used to toast the pecans. Preheat oven to 250 degrees.

Place a Rolo candy on top of each pretzel. Put the baking sheet in the oven and set a timer for 4 minutes. Take baking sheet out of the oven when timer goes off and place on cooling wrack. Immediately press a pecan down onto a Rolo, and continue until all Rolo’s are covered with a pecan. Let cool slightly at room temperature and then transfer to the fridge to harden.

Once they are hardened, store in an airtight container (or eat them all). 

Restaurant Style Chicken Fajitas

Who doesn’t love a good chicken fajita? There isn’t much that someone can’t like about fajitas – yummy vegetables, strips of chicken, and crunchy toppings all wrapped in a warm tortilla. Sooo good! I came across this recipe in the Cook’s Illustrated cookbook. After making them, I decided they were the best chicken fajitas I had ever eaten! Greg said the fajitas tasted like ones that you would get at a nice Mexican restaurant. The chicken is seasoned perfectly (smoked paprika is the BEST) and the veggies have a fabulous flavor and texture. Enjoy!

Recipe for Restaurant Style Chicken Fajitas

INGREDIENTS

For the chicken

  • 3 Tbsp. canola oil
  • 1/4 cup freshly squeezed lime juice
  • 1 1/2 tsp. of smoked paprika
  • 1 tsp. salt
  • 1/2 tsp. ground cumin
  • 1/2 tsp. of black pepper
  • 1/4 tsp. of cayenne pepper
  • 16 ounces of 1/2-inch thick boneless skinless chicken breast

For the vegetables

  • 3 large poblano chile peppers, stemmed, halved & seeded
  • 1 Tbsp. of canola oil
  • 1 medium yellow onion, halved & sliced into 1/4-inch strips
  • 2 garlic cloves, minced
  • 1/4 tsp. of dried thyme
  • 1/4 tsp. of dried oregano
  • 1/3 cup of cream or heavy cream
  • 1 Tbsp. of freshly squeezed lime juice
  • 1/2 tsp. of salt
  • 1/4 tsp. of black pepper

For assembling

  • 8 medium-sized soft tortillas (whole wheat, sprouted grain, flour)
  • Sweet and Spicy Pickled Radishes (recipe below)

DIRECTIONS

For marinating the chicken
In a large container, mix together 2 Tbsp. of canola oil, lime juice, paprika, salt, cumin, black pepper, and cayenne pepper. Add in the chicken breasts and toss well to coat on both sides of the chicken. Cover the container with a lid and let it stand at room temperature for at least 45 minutes, but no longer than an hour.

For the vegetables
While the chicken is marinating, adjust your oven racks. Put a rack in the highest position in the oven and then preheat the oven to 475 degrees. Prepare a baking sheet by lining it with foil. Place the poblano peppers skin side up on the foil and press them down to flatten. Place the baking sheet in the oven on the top rack. Cook peppers until their skin is puffed & slightly blackened, about 7 – 10 minutes. Make sure to rotate the baking sheet halfway through while they are cooking. Remove peppers from the oven and lower oven temperature to 200 degrees.  Transfer the peppers to a bowl and cover them with foil. Allow them to rest for about 10 minutes; then slice the peppers into 1/4-inch strips.

Once oven temperature has lowered to 200 degrees adjust the racks. Put one rack in a middle position and one rack on the lowest position.

Heat the 1 Tbsp. of canola oil in a medium sized nonstick skillet set over high heat. When oil begins to smoke, add onion and cook until a bit blackened and softened, about three minutes. Add garlic, thyme, and oregano and mix. Cook for 30 seconds. Add the cream and cook, stirring frequently, until cream reduces and it coats the onions (about 1 minute). Remove the skillet from heat and add poblano pepper strips, lime juice, salt, and black pepper. Toss well to coat. Transfer the vegetables to a baking dish and cover. Place the vegetables on the middle oven rack.

For cooking the chicken
In a large oven-safe skillet, heat the 1 Tbsp. of canola oil over high heat until it begins to smoke. Add chicken breasts and cook, undisturbed, for 4 minutes. Flip the chicken and remove from heat. Carefully transfer the skillet to the lowest oven rack. Cook the chicken until it registers 165 degrees on a meat thermometer, about 10 minutes. Once chicken is done, remove skillet from oven. Transfer the chicken to a cutting board and allow it to cool for a few minutes. Once the chicken has slightly cooled, cut it in half and then into 1/4-inch thick strips. Return the chicken to the skillet and coat it with the oils. Place the skillet over very low heat for about a minute while you take out the vegetables from the oven and warm the tortillas.

For assembling
Warm the tortillas in the microwave by zapping them for about 15 seconds. Spoon 1 – 2 ounces of chicken into the center of each tortilla and top with the vegetables and radishes.

Nutritional Information:
Each chicken fajita is about 225 – 350 calories, depending on amount of chicken and the type of tortilla used.

Recipe Adapted from: Cook’s Illustrated

Recipe for Sweet and Spicy Pickled Radishes

INGREDIENTS

  • 10 – 12 radishes,  sliced very thin
  • 1/2 cup of freshly squeezed lime juice
  • 1/2 jalapeno pepper, seeded and sliced very thin
  • 3/4 tsp. of granulated sugar
  • 1/4 tsp. of salt

DIRECTIONS

Combine all ingredients in a smallish container. Cover the container, and let sit at room temperature for 45 minutes before using. You can also pickle the radishes by letting them sit in the fridge for 12 – 24 hours before using.

Recipe Adapted from: Cook’s Illustrated