Lucky Charms Cupcakes

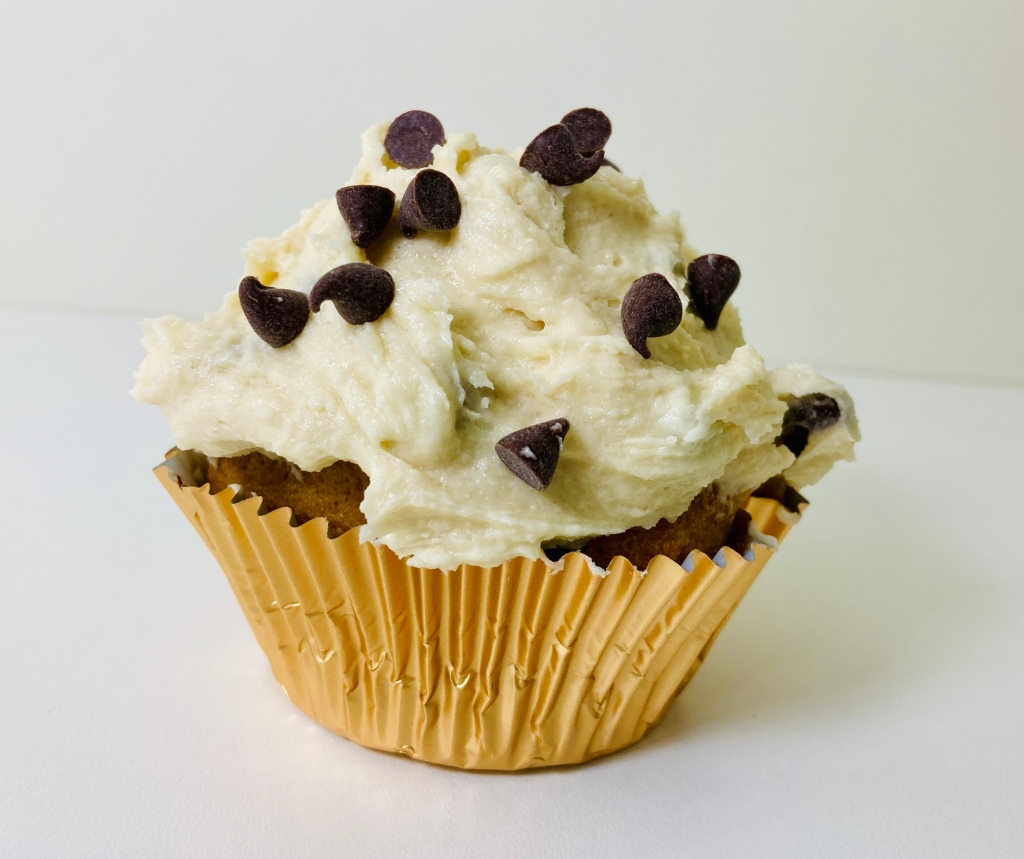
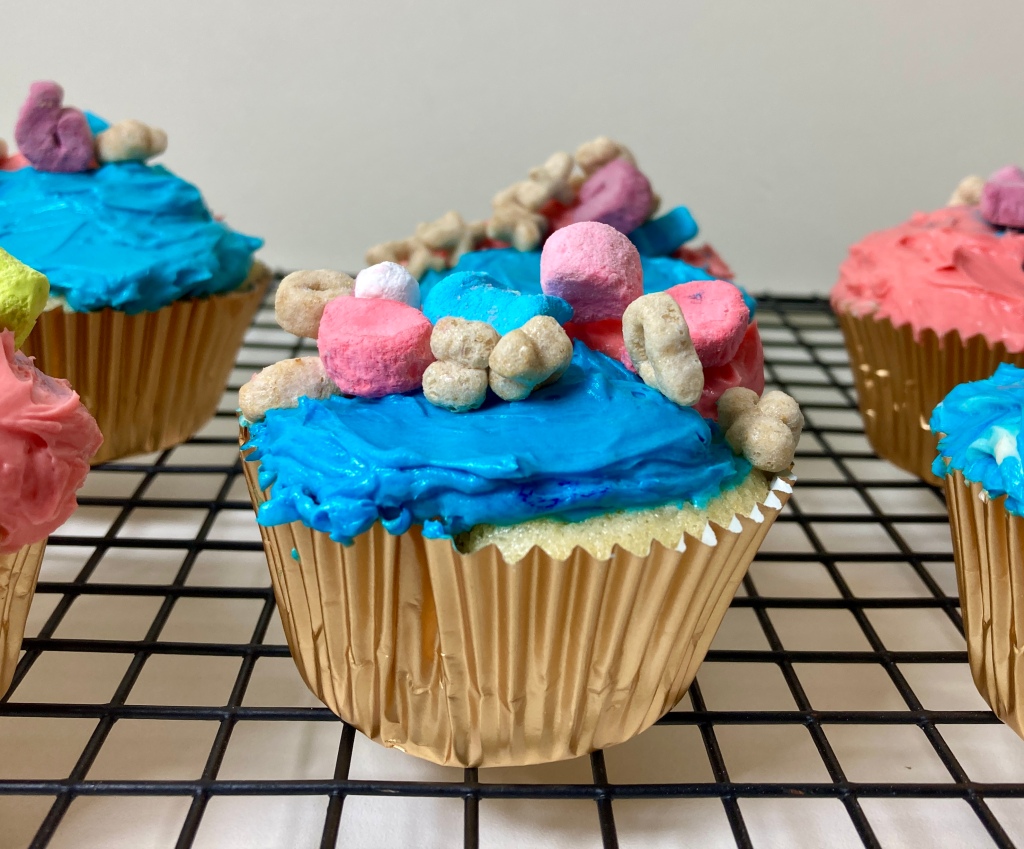
Have you ever had a cupcake that is filled with and topped with Lucky Charms? Well, if you haven’t, you are missing out! Wendy and I made these cupcakes together last year for a fun St. Patrick’s Day treat. When I was thinking of ideas of little gifts I can get her for St. Patrick’s Day, I remembered these fun cupcakes. I bought her a box of Lucky Charms and a rainbow pop-it purse off of Amazon, and I told her we’d make these cupcakes as soon as I had the energy! We made them together yesterday, and we both ate way too many of the fun marshmallows as we baked!

These cupcakes start with a delicious vanilla cake, then they are filled with marshmallow and Lucky Charm marshmallows (unless you get the prank cupcake, which is just filled with the cereal part)! Then they are topped with a colorful buttercream frosting and the Lucky Charms cereal. They are SO good! You can stuff the cupcakes with the marshmallow cream first and then add the Lucky Charms, or you can do the Lucky Charms first and then add in the marshmallow cream. Whichever makes you happiest. Enjoy!

Recipe for Lucky Charms Cupcakes

INGREDIENTS

For the cupcakes

  • 1 cup plus 2 Tbsp. cake flour
  • 1 1/2 tsp. baking powder
  • 1/4 tsp. salt
  • 1 cup sugar
  • 4 Tbsp. unsalted butter, at room temperature
  • 2 egg whites
  • 1/2 cup plus 2 Tbsp. of whole milk
  • 3/4 tsp. pure vanilla extract

For the marshmallow filling

  • 1/2 container of marshmallow fluff (7.5 ounce container)
  • 3 Tbsp. unsalted butter, at room temperature
  • about 30 – 40 Lucky Charm marshmallows

For the frosting and topping

  • 2 sticks of unsalted butter, at room temperature
  • 1 1/2 cups of powdered sugar
  • 1/4 cup marshmallow fluff
  • 1 Tbsp. of whole milk
  • 1 1/2 tsp. of pure vanilla extract
  • food coloring
  • Lucky Charms cereal

DIRECTIONS

For the cupcakes

Preheat the oven to 350 degrees. Line a cupcake pan with 10 cupcake liners (recipe makes about 10 cupcakes).

In a small mixing bowl, mix together the flour, baking powder, and salt. Put the butter and sugar into a large mixing bowl. Use an electric hand mixer set to medium-high speed to beat together until light and fluffy. Add in the egg whites and mix on medium until incorporated. Add in a third of the dry ingredients and mix on medium speed, then add in half of the milk and mix. Continue to alternate adding in dry ingredients and milk. Then mix in the vanilla extract.

Fill the cupcake liners 2/3 – 3/4 way full. Place in oven and cook for 7 minutes, then use an oven mitt to rotate the cupcake pan and cook for an additional 6 – 7 minutes. Cupcakes are done when a toothpick or fork comes clean when stuck into the center of the cupcake.

Let cupcakes cool for ten minutes in pan, then transfer to a wire rack.

For the marshmallow filling

Add the marshmallow fluff and butter to a small mixing bowl and mix with an electric hand mixer on medium low speed until smooth. Use a cupcake corer to make holes in the cupcakes. Use a spoon to fill each cupcake with the marshmallow cream. Add three to four Lucky Charm marshmallows to the marshmallow cream.

For the frosting

In a large mixing bowl, beat the butter with an electric hand mixer on high speed until smooth. Add in 1/2 cup of the powdered sugar and beat well. Then add in the marshmallow fluff and beat well. Add the remaining powdered sugar and mix until smooth and fluffy. Beat in the milk and vanilla extract. Add in more powdered sugar if needed for consistency. Now, divide the frosting into separate bowls for the food coloring. Mix in desired color to each and mix. Frost cupcakes and then top with as much or as little cereal as you’d like. EAT up and feel the marshmallow magic! Store in an airtight container in the fridge.

Recipe Adapted from/Source: Sugar and Charm

By the way, the leprechauns visited our house this year too!

Advertisement

Chocolate Chip Cookie Dough Cupcakes

Guess what? You need these chocolate chip cookie dough cupcakes in your life right now. These chocolate chip cookie dough cupcakes are here to help you chase any blues away. Just like the cookie dough truffles, there is no raw egg in the cookie dough filling. The mixture is made up of everything that is good in life,  like butter, brown sugar, condensed milk, flour, vanilla, chocolate chips, and a little bit of love.

I made these for the first time years ago on a baking date with one of my friends. When I had seen the recipe on blogs I wanted to make them, but thought they looked too complicated. Doing them with a friend was less intimidating! Now that I have more baking experience, I am able to make these independently in my kitchen, even with a little helper around! They do take some extra steps, but nothing is tricky, and the time is oh so worth it!

So, what are you waiting for? Go make some chocolate chip cookie dough cupcakes, and put a smile back on that face. Enjoy!

This recipe makes one dozen cupcakes, because in my family of three, that is all we usually need – even when we share with our friends and family!

Recipe for Chocolate Chip Cookie Dough Cupcakes

INGREDIENTS

For the cupcakes

  • 1 1/2 sticks (12 tablespoons) of unsalted butter, at room temperature
  • 3/4 cup of light brown sugar, packed
  • 2 large eggs
  • 1 1/2 cup plus of cake flour OR 1 1/3 cup all-purpose flour
  • 1/2 tsp. of baking powder
  • 1/2 tsp. of baking soda
  • 1/8 tsp. of salt
  • 1/2 cup of whole milk
  • 1 tsp. of pure vanilla extract
  • 1/2 cup of semisweet chocolate chips

For the cookie dough filling

  • 2 Tbsp. of unsalted butter, at room temperature
  • 3 Tbsp. of light brown sugar, packed
  • 1 cup plus 2 Tbsp. of all-purpose flour
  • 3 1/2 ounces of sweetened condensed milk
  • 1/ tsp. of pure vanilla extract
  • 3 Tablespoons of semisweet chocolate chips (regular or miniature)

For the cookie dough frosting

  • 1 stick of unsalted butter, at room temperature
  • 1/4 cup of light brown sugar, packed
  • 1 1/8 cup of powdered (confectioners’) sugar
  • 1/3 cup of all-purpose flour
  • 1/4 tsp. of salt
  • 1 Tbsp. of whole milk or heavy cream
  • 1 tsp. of pure vanilla extract
  • Extra chocolate chips, for topping cupcakes

DIRECTIONS
For the cupcakes
Preheat the oven to 350 degrees. Line two cupcake pans with paper liners. Put the butter and the brown sugar in a large mixing bowl and use an electric hand mixer to mix on medium high speed until light and fluffy, about 3 – 4 minutes. Then add in the eggs one at a time, beating well after each addition.

Combine the flour, baking powder, baking soda, and salt in a medium mixing bowl and stir together. Add one third of the flour mixture into the butter mixture and beat on low speed, then add 1/2 cup of the milk and beat again on low speed. Continue alternating and end with the dry ingredients, mixing each time until just incorporated. Add in the vanilla extract and mix. Fold in the chocolate chips.
Divide the batter evenly into the paper liners. Bake for 18 – 20 minutes, or until a toothpick inserted in the center of the cake comes out clean. Allow the cupcakes to cool in the pan for 10 minutes, then transfer to a wire rack and let cool completely.

For the cookie dough filling
Once cupcakes are in the oven, make the cookie dough filling. Combine the butter and sugar in a mixing bowl and mix on medium high speed with an electric had mixer until light and fluffy, about 3 minutes. Then mix in the flour, sweetened condensed milk, and vanilla extract and mix until smooth. Stir in the chocolate chips. Cover the bowl and put in fridge until mixture is firm, about one hour.

To stuff the cupcakes
When cupcakes are cooled, add in the cookie dough! Cut a cone-shaped portion (or use a spoon and scoop) out of the center of each cupcake. Fill each hole with a ball of the cookie dough mixture. Use all of the filling to stuff the cupcakes – the more you have, the better the cupcake!

For the frosting
Put the butter and brown sugar into a medium mixing bowl and use an electric hand mixer set on medium high speed to beat until creamy. Add in the confectioners’ sugar and mix until smooth. Add in the flour and salt and mix until just incorporated. Pour in the milk and vanilla extract and beat until smooth and well incorporated.

Frost the cupcakes, top with chocolate chips, and celebrate!

*Recipe makes approximately 1 dozen cupcakes.
Store cupcakes in an airtight container in the fridge.

Source: Everyday Annie, which sources the recipe is inspired by Hello Baker, the cake adapted from Cupcake Bakeshop, the frosting adapted from The Cupcake Review, and the filling from How to Eat a Cupcake.

Brownie Truffles

Have you ever heard of a “happy accident?” Years ago I worked with a woman who had so many of her own sayings, to the point where I labeled them *Meganisms, after her name. I would constantly laugh at the things she would say, but now I find myself repeating everything she did say in my old(er) age. One of her ‘isms was “happy accidents.” If a mistake was made and we turned it into something good, she would always say “now that is what you call a happy accident!” Once upon a time I was baking brownies and pies, and I was a bit distracted while cooking. I have never been the best multitasker, and I ended up making a pretty big mistake with the brownies. When I took them out of the oven, I could tell something seemed different about the texture, but I couldn’t quite put my finger on it. Then it hit me. I was halving a recipe and instead of putting a half pound (2 sticks) of butter in the brownie batter, I had only put in a quarter pound (1 stick). I had it in my head that one stick has 8 tablespoons of butter and translated that into 8 ounces, which is a half pound! So, what did I do? At first I thought that the brownies tasted fine, just a little dry, and I was right. But I decided I didn’t want dry brownies. So I turned those brownies into brownie truffles! And that, my friends, was a happy accident that occurred in my kitchen. The brownie truffles are even better than the brownies, which are pretty darn good. They are very rich, and you might just need one. My niece, however, exclaimed that she could only eat three (in a matter of five minutes or less) because they were so rich. Here is the recipe for these out of this world brownie truffles. Enjoy!

*Note: Name has been changed to protect the anonymity of the individual but the story is true.

Recipe for Brownie Truffles

INGREDIENTS

For the brownies:
One 12 ounce bag of Ghiradelli semisweet chocolate chips
One 10 ounce bag of Ghiradelli bittersweet chocolate chips (you will have a little leftover)
3 eggs
1 stick (8 Tbsp.) of unsalted butter
1 Tbsp. of instant coffee granules
1 Tbsp. of pure vanilla extract (I like Nielsen Massey)
1 cup granulated sugar
1/2 cup plus 2 Tbsp. of all-purpose flour
1 1/2 tsp. of baking powder
1/2 tsp. of salt
For the truffle filling:
Cooked brownies
1 stick of unsalted butter, at room temperature
For the truffle coating:
One 9.7 ounce bar of bittersweet baking chocolate (70% cacao) , coarsely chopped

DIRECTIONS

For the brownies:
Preheat the oven to 350 degrees. Butter and flour a 13 x 9 baking pan (mine is 2.75″ deep).
Melt the butter, half the bag (6 ounces) of the semisweet chocolate chips and a little over half the bag of bittersweet chocolate chips (about 6 ounces) in a medium saucepan over simmering water. Stir constantly until fully melted and smooth, then remove the saucepan from the heat and allow it to cool slightly.
In a large mixing bowl, gently stir the eggs, coffee granules, pure vanilla extract, and sugar. Then stir the chocolate mixture in and allow it to cool to room temperature.
In a medium bowl, sift together 1/2 cup of the flour, baking powder, and salt. Stir in to the chocolate mixture. In a smallish bowl, toss the remaining flour and the rest of the bag of semisweet chocolate chips and about 2 ounces of the bittersweet chocolate chips together. Coat the chocolate chips as well as you can with the flour. Then fold into the chocolate batter. Spread the brownie batter evenly into the prepared baking pan.
Bake for 20 minutes, and then after 20 minutes, rap the pan against the oven shelf to get air to escape between pan and dough. Then bake for an additional 8 – 12 minutes, or until a toothpick comes out clean when inserted.
Transfer the brownie pan to a cooling rack and allow to cool.
Once brownies are cooled to room temperature (or slightly warmer), scrape all the brownie into a large bowl. Add in the softened butter. Use your hands to work together. Then use an electric hand mixer set on medium low speed and beat until smooth. It should kind of resemble a batter again. Cover the bowl and place in the fridge for a couple hours.
Line a couple freezer safe containers with foil. Use a cookie dough scoop and your hands to form the mixture into 3/4-inch balls. Place each ball into the foil lined containers. Cover containers and place in freezer for several hours, or overnight.
Prepare a double boiler with water. Bring water to a simmer, and then place the bittersweet chocolate in top boiler and melt over the simmering water. Once chocolate is melted, turn off stove heat. Drop one ball at a time into the melted chocolate and use a spoon to coat. Place each coated ball onto a foil lined baking sheet. Place baking sheet in fridge and allow coating to harden before serving. If not serving right away, store in the fridge in airtight containers. Brownie truffles can be served from fridge or at room temperature.

Brownie recipe adapted from: Ina Garten’s Outrageous Brownies Recipe
Brownie truffles – original recipe.

Recipe makes approximately 4 dozen brownie truffles

Coconut Ice Cream with Toasted Coconut

This toasted coconut ice cream is absolutely divine! I saw this recipe in an ice cream recipe book quite some time ago, and I have been wanting to make it for so long. I was a little nervous about the recipe because of the egg in the mixture, as I tend to always make ice creams that require no cooking, but I decided to take the extra time with this one. If you are a fan of coconut, you should really try out this incredible toasted coconut ice cream. However, if you are one of those crazy people, and you are “repulsed” by the thought of coconut, then maybe you shouldn’t! I hope there are more coconut lovers out there than haters, because people who hate coconut just make me sad. If you do love coconut like I do, than you’ll love this toasted coconut ice cream. Enjoy!

Recipe for Coconut Ice Cream with Toasted Coconut

INGREDIENTS

1 1/2 cups of whole milk
1 1/2 cups of heavy whipping cream, divided
2 1/4 cups of sweetened shredded flaked coconut, divided
4 egg yolks
3/4 cup of granulated sugar
1/4 cup of coconut cream (I used Trader Joe’s)
1 tsp. of pure vanilla extract
A little less than 1/8 tsp. of almond extract (optional)

DIRECTIONS

In a large pot, mix together the whole milk, 1 cup of the heavy whipping cream, and 1 1/4 cups of the coconut. Set over medium heat and cook until bubbles form around the edge of the mixture, about 5 – 7 minutes. Remove from heat and let sit for 20 minutes.

Pour the milk mixture through a fine mesh sieve into a large bowl and press down on the coconut to extract as much flavor as possible. Then discard the coconut. Pour the strained milk mixture back into the pot and set back over medium heat. Cook again until bubbles form around the edge of the milk, about 5 – 7 minutes.

While the milk mixture is heating, separate out the egg yolks and place into a medium sized bowl. Add in the remaining 1/2 cup of heavy whipping cream and the sugar. Mix the ingredients until well-combined.

Carefully scoop out 1/2 cup of the hot milk mixture and add into the egg mixture. Mix until smooth. Then carefully pour the egg mixture into the pot with the hot milk mixture. Cook over medium heat, stirring constantly, until a custard forms. The custard should coat the back of the wooden spoon when it is ready. Do not let the mixture come to a boil. It should take about 7 – 9 minutes for the custard to form. Once the custard coats the back of the spoon, remove from heat. Stir in the coconut cream and mix well. Pour into a large bowl and add in the vanilla extract and almond extract.

Partially fill a large enough bowl that will fit the bowl with the ice cream mixture in it with cold water and ice cubes. Then set the bowl with the ice cream batter into that bowl. Stir occasionally. Once the mixture is cooled, cover with a lid or tightly with plastic wrap. Put in the fridge for at least 4 hours, or overnight.

While the mixture is chilling, toast the coconut. Put the remaining cup of coconut into a small frying pan and set over medium-high heat. Cook, stirring frequently, until the coconut and toasty and lightly browned, about 5 minutes. Remove from heat and pour into a bowl. Allow it to cool and then seal in an airtight container until ready to use. 

Pour the chilled ice cream mixture into the bowl of an automatic ice cream maker and make the ice cream according to manufacturer directions. When the ice cream is the consistency of thick whipped cream, add in 1/2 cup of the toasted coconut and continue the mixing in the ice cream maker until done. Then transfer the ice cream to an airtight container and place in freezer for a couple hours before serving.

Top each serving with the leftover toasted coconut, if desired.

Recipe makes approximately 8 servings.

Recipe Adapted from: Williams Sonoma Ice Cream

Basic Vanilla Ice Cream (no eggs)

The best gift I have ever received was my automatic ice cream maker. Ever since I got it, I have loved creating new ice cream recipes. I have made coconut ice cream, green tea ice cream, rum raisin ice cream, chocolate mint ice cream, and the list goes on and on! Of course, the very first recipe I ever made with the ice cream maker was this simple and delicious vanilla ice cream. It is very easy to make and it is that classic vanilla flavor that everyone likes.

When I first began trying out recipes, I really did not know that you could make ice cream at home without any eggs. Fancier ice cream recipes do use egg yolks, but basic recipes can be made with just cream, sugar, whole milk, extracts, and add ins.

If you do not have an automatic ice cream maker at home, then you need to go out or get online and buy one! You will love the creations you can make in your kitchen and you will never go back to store-bought again! Enjoy.

Recipe for Basic Vanilla Ice Cream

INGREDIENTS

  • 1 vanilla bean, split lengthwise with beans scraped out (if you do not have a vanilla bean, just increase the vanilla extract in the recipe by one teaspoon)
  • 1/2 tsp. of pure vanilla extract (use a high-quality vanilla)
  • A dash of salt
  • 1/2 cup of whole milk, well-chilled
  • 1/3 cup + 2 tsp. of granulated sugar
  • 1 cup of heavy whipping cream, well-chilled

DIRECTIONS

Scape the vanilla beans into a very small bowl. Pour the vanilla extract over the vanilla beans and mix with a spoon. Add in the dash of salt. Set aside.

Pour the milk into a medium bowl. Add in the sugar, and then beat mixture with an electric hand mixer on low speed for 1 minute, or until sugar is fully dissolved. Stir in the vanilla mixture. Pour in the heavy cream, and then beat again on the lowest speed for about 10 – 15 seconds. Cover bowl and put in fridge for about an hour.

Once mixture has chilled, pour the mixture into an ice cream maker and follow manufacturer directions. After mixture has turned into ice cream (with my new ice cream maker, it takes about 25 minutes), scrape into a Tupperware or snaplock, cover and put in freezer to set. Enjoy!

Recipe Adapted from: Cuisinart Automatic Frozen Yogurt-Ice Cream & Sorbet Maker Instruction and Recipe Booklet

Dark Chocolate Ginger Truffles

I am a lover of ginger. I think that ginger is one of those things that people either love or hate. So, if you’re not a ginger lover than perhaps this truffle is not for you. But, if you enjoy its warm and subtly spicy flavor then I do believe you will absolutely love this truffle. I was first introduced to the combination of ginger and chocolate at a chocolate shop in San Francisco several years back. My husband and I visited my sister who was living in Noe Valley at the time and we  happened to walk into the store. It was the first time that I realized that chocolate could be combined with spices and it opened up a whole new world for me. I ordered a bunch of the chocolate and then later chocolate by Vosges started popping up and I was able to  buy exotic chocolates at the grocery stores! And, I have tried the bacon and chocolate bar and I’ve got to be honest, I’m not a fan. Are you?

The filling of this dark chocolate ginger truffle is made of a dark chocolate ganache with freshly grated ginger and then it is coated with an even darker chocolate and topped with a piece of crystallized (candied) ginger. They are so good that someone who sampled them came to me weeks later and asked me to make them for her so she could give them to someone as a gift. That is the thing with truffles. They are very special and if you take the time to make them, they make perfect gifts. Or, perfect treats just for you and nobody else! Enjoy.

Recipe for Dark Chocolate Ginger Truffles

INGREDIENTS

For the ganache filling
4 1/2 ounces of heavy whipping cream
3/4 – 1 tsp. of grated fresh ginger (use a microplane to grate)
5 1/2 ounces of semisweet chocolate, very finely chopped
For rolling, dipping and topping
Dutch-processed cocoa powder (for rolling)
8 ounces of bittersweet chocolate, finely chopped (for coating)
Several pieces of crystallized ginger, cut into thin and small pieces (for topping)
decorative sugar, if desired (for topping)

DIRECTIONS

Heat the cream and ginger in a medium saucepan over medium heat. When it comes to a simmer, immediately pour the very finely chopped semisweet chocolate it and remove from heat. Cover the pan with a lid and allow it to sit for five minutes. After five minutes, use a spoon to stir gently until the mixture is smooth and all the cream is mixed in to the chocolate. Pour the chocolate into a shallow container, cover tightly, and set in the fridge for at least 4 hours.
Take the mixture out of the fridge and open container. Dust hands with cocoa powder and have a bowl of cocoa powder and paper towels very close by. You may want to roll up your sleeves, too! Use a cookie dough scoop to scoop some of the mixture and gently shape into a ball. Drop onto a foil lined container. Continue to scoop and shape and drop until the mixture is gone. Then cover the container tightly and put in the freezer for at least 4 hours, preferably overnight.
Prepare a double boiler with about one inch of water. Once the water begins to steam, put the pan with the bittersweet chocolate on top and stir until it is thin and smooth. Take the ganache filling balls out of the freezer. Line a baking tray with foil. Drop a ball into the chocolate, use a spoon to coat, and then drop on the foil lined tray. Top with a piece of crystallized ginger and sprinkle on some decorative sugar, if desired. Put the tray in the fridge until they harden, then store in an airtight container in the fridge. Store in the fridge but when they are served, serve at room temperature.

Recipe makes approximately 2 dozen truffles.
Recipe Adapted from: Truffles, by Dede Wilson

Zucchini Brownies (No Butter, Flour, Sugar, Oil, or Egg)!

I discovered these zucchini brownies years ago when I was experimenting with different recipes with zucchini. I had come across the recipe on Pinterest, and since at that time I had tons of zucchini growing in my garden, I gave them a try. They were so much better than I had expected! They were actually pretty incredible. I think these brownies are just as good as any other brownie I have ever had, and if you are gluten-free or health conscious, these are a dream come true! The true test of the amazingness of the zucchini brownies was when my nieces came for a visit. Now, they have been known to be pretty picky about what they eat (they were on a mac and cheese & bread diet back in the day). I decided to give them the brownies but did not tell them that they were healthy or filled with veggies. When they were devouring them, I asked if they liked them, and they said yes – and then asked if they could have more! After they ate their seconds, we spilled the beans to let them know that they ate brownies with zucchini! These brownies are sure to be a new favorite sweet treat to make when you are looking for something a little healthier. Because they have some chocolate in the batter, the brownies are not vegan. And, when it says no sugar, that means there is not any granulated sugar in the recipe, but obviously there is sugar in the natural ingredients in the recipe. But they are gluten-free, healthy, and delicious! Make sure to put them into the fridge to harden before cutting and serving. Enjoy!

Recipe for Zucchini Brownies (No Butter, Flour, Sugar, Oil or Egg)

INGREDIENTS

  • 1 1/2 cups grated zucchini
  • 1 cup of store bought almond butter, at room temperature
    1/2 cup of honey
    1 Tbsp. of pure maple syrup
    1/8 tsp. of pure vanilla extract
    3/8 tsp. of baking powder
    1/2 tsp. of baking soda
    1 Tbsp. of cocoa powder (I used natural cocoa powder)
    1/16 tsp. of salt
    4.5 ounces of bittersweet chocolate (70%) chopped coarsely
    1/2 cup of mini semisweet chocolate chips
    Coarse sea salt, for sprinkling (optional)

DIRECTIONS

Preheat the oven to 350 degrees. Generously grease the bottom and sides of an 8 x 8 pan with butter or coconut oil (this will be the only butter or oil used in the entire recipe).

Combine the grated zucchini, almond butter, honey, and maple syrup in a large bowl. Use a mixing spoon and stir until ingredients are well incorporated. Add in the vanilla extract.

In a smallish bowl, combine the baking powder, baking soda, salt, and cocoa powder. Sift the ingredients together and then set aside.

Heat the bittersweet chocolate. Prepare a double boiler and heat the chocolate in a pan over simmering water. Stir constantly until the chocolate is melted and smooth. Set the melted chocolate aside and allow it to cool slightly (a few minutes). Spoon the melted chocolate into the zucchini mixture, and mix to incorporate well. Add in the cocoa powder mixture and stir well. Fold in the mini chocolate chips. Pour the batter into the prepared baking pan. Sprinkle desired amount of coarse sea salt over the batter (a little goes a long way – I used just a couple pinches). Put into the oven and bake for 35 – 40 minutes, rotating the pan halfway during baking.

Remove from oven. Allow them to cool completely at room temperature. Cover with foil and put into the fridge to harden for a couple hours before cutting and serving.
*Makes about 16 brownies*
Recipe Adapted from: Delighted Momma, originally from Fast Paleo

Zucchini brownies – healthy(er) & delicious! I added decorative
sugar to celebrate how awesome they are. 

Spicy Ginger Labor Inducing Cookies

This recipe post definitely brings back some memories! When I was pregnant with my daughter and in my third trimester, I always felt like I was going to go into labor with her any day. Everyone who saw me thought so too, as I would have random strangers at the grocery store look at my and tell me I looked like I was going to was going to have the baby pop out of me (I remember this clearly when I was about 33 weeks along….). You can imagine my shock when my due date approached and still no baby! My due date came and went, and of course for days I thought I was going into labor, and each day I thought “today is the day.” But then it never happened. I had to be induced at 130 AM on Monday April 7th. Even after they induced me, I was worried that it wouldn’t work. Another mommy to be came into the hospital at the same time as I did and they had to send her home and reschedule! Luckily, after hours and hours and more hours, I gave birth to Wendy Olivia at 7:20 PM that evening. She has been a joy for almost 8 years since then (and for new mamas, when they say time flies…it actually does). Cherish every second!

Before I was induced that night I was trying natural ways at home to induce labor. I was just hoping that it would happen before having to go into the hospital. I had heard stories of women eating different things like pineapple or spicy food and that it worked for them. I tried tons of stuff, and then I came across a recipe for these cookies. They are supposed to induce labor because of the ginger in them, which apparently has been known to do the trick. Well, another trick that did not work for me, but the cookies were dang good! They were probably the best ginger cookies I had ever had, and Greg definitely agreed. They have just the right balance of sweet, gingery, and spicy and they are totally a comfort treat. And hey, maybe they will help you with natural labor! Enjoy!

Recipe for Spicy Ginger Labor Inducing Cookies

INGREDIENTS

2 1/2 cups all purpose flour 1 1/2 tsp. of baking soda
1 tsp. of ground cinnamon
1 1/4 tsp. of ground ginger
1/2 tsp. of ground cloves
1/2 tsp. of salt
1/2 tsp. of cayenne pepper
8 Tbsp. of unsalted butter, softened at room temperature
1/2 cup of granulated sugar
1 cup of light brown sugar, packed
1/3 cup of blackstrap molasses
1/2 tsp. of pure vanilla extract
2 eggs
For rolling:
Granulated Sugar
1/8 tsp. ground cinnamon
1/8 tsp. ground ginger

DIRECTIONS

Preheat the oven to 350 degrees.
In a medium bowl, sift together the flour, baking soda, cinnamon, ginger, cloves, salt, and cayenne pepper. Set aside.
Put the butter in a large bowl. Add in the granulated sugar and light brown sugar. Beat with an electric hand mixer set on medium-low speed until smooth and creamy. Add in the molasses, vanilla extract, and eggs and beat well. Add the flour mixture and beat again until well-incorporated.
In a small bowl, mix together the sugar, cinnamon, and ginger.
Use a cookie dough scoop to scoop dough into 1-inch balls. Roll each ball in the sugar mixture and then place on a cookie sheet lined with foil or parchment paper. Bake for about 10 minutes or until golden brown. Let cool for a few minutes on baking sheet then transfer to a cooling rack, although these cookies do taste best when they are still nice and warm!

Recipe Adapted from: Just Mommies

Here is a picture of my sweet Wendy Olivia, which was taken shortly after she was born, April 7th 2014.

And here is a picture of her today!

Rum Raisin Ice Cream (no egg)

Greg’s all-time favorite ice cream flavor is rum raisin. Whenever we do go out for ice cream (which really isn’t very often), he goes for the rum raisin. After visiting Maine together in 2017, I thought it would be fun to surprise him at home with his favorite ice cream flavor. It started wit the soaking of the raisins in rum for quite some time. Then, I made waffle cones for the rum raisin ice cream!

This recipe was easy because it did not involve any egg in the ice cream mixture. It is just made of milk, cream, sugars, raisins, cinnamon, vanilla, and rum. The most difficult part of this recipe is the waiting…because the waiting is the hardest part. You know it is going to be so so good, but you just have to wait so long to taste the deliciousness. If you are a rum raisin ice cream fan, and you have an automatic ice cream maker at home, go ahead and give this recipe a try. The flavor of the ice cream is sweet with a hint of cinnamon, and the raisins have just the right amount of rum bursting out of them in every bite you take.  Enjoy!

Recipe for Rum Raisin Ice Cream (no egg)

INGREDIENTS

1/2 cup dark raisins
3 Tablespoons dark rum 
3/4 cup whole milk
Just under 1/8 teaspoon cinnamon, plus a couple pinches for raisin mixture
1 Tablespoon plus 2 teaspoons dark brown sugar
1/4 cup white sugar
Pinch of sea salt
1 cup heavy whipping cream
1/2 teaspoon pure vanilla extract

DIRECTIONS

First, soak the raisins. Put the raisins into a bowl and pour in the rum. Add in a couple pinches of cinnamon. Give it a stir, then cover with a lid and let sit at room temperature for 24 hours. A couple hours before the raisins are finished soaking, mix together the milk, dark brown sugar, white sugar, just under 1/8 teaspoon cinnamon, and sea salt. Beat until well blended. Then stir in the heavy whipping cream. Cover, and put in the refrigerator for two hours.

After the 24 hours of soaking, drain the rum off the raisins, reserving one tablespoon plus 1 teaspoon of the rum for later. Set aside the reserved rum, cover the raisins, and set raisins in the fridge until ready to add into the ice cream maker. Put the chilled ice cream mixture into the bowl of an automatic ice cream maker. Make according to directions, and a few minutes before it is done, pour in the reserved rum  and vanilla extract. Then, add in the raisins. When ice cream is finished churning, scoop it into a container and seal. Put in the freezer for at least 24 hours before serving.

Recipe Adapted from: Serious Eats

Having an automatic ice cream maker is life changing. Seriously.

Warm Chocolate Pudding Cakes with Whipped Cream & Cacao Nibs

Okay, warm chocolate pudding cakes are seriously one of the best things I have ever tasted in my life. For real. If you are a diehard chocolate lover, you really need to make this dessert.

I made these chocolate pudding cakes for the first time during some snow days I had years ago. On snow days, I always love to make new meals or treats. I found this recipe in a cookbook, Scharrfen Berger “The Essence of Chocolate” cookbook. These warm chocolate pudding cakes are rich and chocolatey but not too sweet – and they are the ultimate comfort dessert. I hope you enjoy these amazingly scrumdiddlyumptious warm chocolate pudding cakes.

Recipe for Warm Chocolate Pudding Cakes with Whipped Cream & Cacao Nibs

INGREDIENTS

  • For preparing ramekins: Unsalted butter, cocoa powder
  • 3.5 ounces of 99% unsweetened chocolate, finely chopped
  • 1 cup of heavy whipping cream
  • 4 Tbsp. of unsalted butter, cut into 1-inch cubes
  • 2/3 cup granulated sugar
  • 1 Tbsp. cornstarch
  • 1/4 tsp. salt 2 eggs
  • For topping: 1/2 cup heavy whipping cream, cacao nibs

DIRECTIONS

Adjust oven so that a rack is in the middle position and then preheat to 325 degrees.

Butter 4 – 5 ramekins or oven safe bowls that hold at least 6 ounces. Dust the bottoms and sides of each one generously with cocoa powder, making sure to tap out the loose excess powder.

Put the heavy whipping cream and cubed butter into a medium-sized pan. Place over medium heat and bring to a simmer. Once it simmers, immediately add in the finely chopped chocolate. Remove from heat and allow it to sit for one minute. Then whisk the mixture until the chocolate is completely melted and the mixture is nice and smooth.

In a large bowl, sift the sugar, cornstarch, and salt together. Add in the eggs and whisk. While whisking, add in the melted chocolate and mix until well incorporated. Place a fine mesh strainer over top a 4-cup liquid measuring cup. Pour the mixture through the strainer. You will get about 3 cups of batter in the measuring cup. Pour the batter into the prepared ramekins/oven safe bowls. Place them onto a baking sheet and put into the oven. Cook for 30 – 35 minutes, or until the tops are puffed up and slightly cracked. Allow to cool for 10 – 15 minutes.

While the pudding cakes are cooling, make the whipped cream. Place 1/2 cup of heavy whipping cream into a metal bowl and use an electric hand mixer set on high speed to mix until stiff peaks form. Top each pudding cake with a couple tablespoons of whipped cream and some cacao nibs.

*These are best when warm. If you save them, cover tightly with plastic wrap and store in fridge. Place in microwave for about 25 – 30 seconds before eating.

Recipe Source: The Essence of Chocolate, by John Scharrfenberger and Robert Steinberg

%d bloggers like this: